Perfect zoom blurs every time: Lensbaby Composer

When you don’t want razor sharpness…

I am currently in the process of properly calibrating the focus on my Canon lenses using the LensAlign system I rented after some recent frustrations with back-focusing while using the Canon 7D and 400mm DO IS lens.  At the same time, I am also experimenting with a Lensbaby Composer that I rented to round out the order. It offers the complete opposite of what I am seeking for my other lenses: fuzziness.  In fact, its effect is akin to a zoom blur, only far more consistent in its results than zooming a telephoto lens while dragging the shutter could ever be!
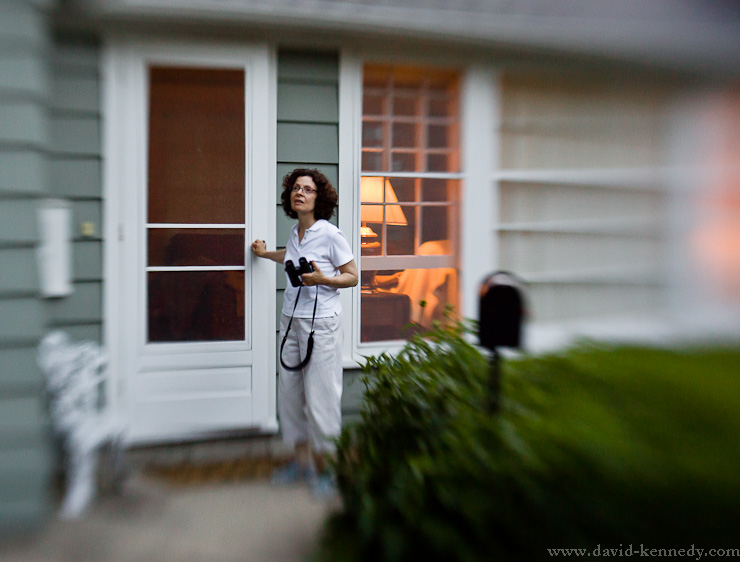
Walking out the front door
Mom walking out the front door, Racine, Wis. | Canon 5D Mark II and Lensbaby Composer | Exposed 1/320 sec. @ f/2.8, ISO 1600 (-2/3 EV)

One of the first things I noticed when using this lens is that its color rendition on my 5D Mark II left something to be desired.  I was prepared for and expected to have fun with the highly-selective focus / blurry nature of the Lensbaby, but I did not want wonky color to be a part of the experience.  As I wrote earlier this year, the X-Rite Colorchecker Passport can be an incredibly useful tool when a camera and lens combination is not yielding the kind of color that you expect.  Have two bodies and want similar color?  Profile both of them in the same lighting condition.

More after the jump!

Continue reading “Perfect zoom blurs every time: Lensbaby Composer”

Flying over Memphis

Flying over Memphis
Flying over Memphis | Panasonic G1 and Olympus 9-18mm f/4-5.6 ED lens; exposed 1/640 sec. @ f/8, ISO 100.

Oh, to have a wide-angle lens for the G1!  Thanks to Olympus and to David Rees, the department chair of the photojournalism sequence at the University of Missouri School of Journalism, I have a 9-18mm f/4-5.6 ED lens for my Micro Four-Thirds format for testing.

This lens is the only alternative to Panasonic’s 7-14mm f/4 wide-angle zoom, which is, unfortunately, ridiculously expensive.  Not that the Olympus zoom is inexpensive.  I’ll have more thoughts as the summer progresses.

7D Sharpness at Higher ISO’s?

American Robin
American Robin, Peace Park, Columbia, Mo. | Canon 7D and 300mm f/4L lens; exposed 1/200 sec. @ f/4, ISO 1600

I have owned the Canon EOS 7D for a few months now; I purchased one in November 2009.  One of the concerns I had with the 7D, at least initially, was that the files simply did not seem sharp “enough” at higher ISO’s because of the noise degrading the image quality.  And I do believe that, in the case of basketball arenas and other dark situations where, frankly, “exposing to the right” to get a good histogram (and a good exposure) means cranking up the ISO to 4000, the quality certainly does go down.  However, that’s true even of the oft-touted Nikon D3.  And I don’t necessarily give the camera its fairest chance in those situations, because I prefer to use f/4 telephotos.  Why?  They’re smaller, they’re lighter, and they cost less.  They cost less now, and they will cost me less in the future because I won’t need an artificial shoulder or knees like some of my colleagues when we all grow older.

This past Saturday, I found myself crawling around Peace Park with the 7D and the 300 in order to make this series of a Robin spitting out a berry.  One of the things that pleased me greatly was that, as the light got dimmer and I resorted to higher ISO’s, the detail was held solidly from my ISO 1600 frames.  How well?  Below is a 100% crop of the head and bill detail:

100% Detail
100% Pixel Detail. No noise reduction or sharpening applied.

Note that this is before processing the image with any noise reduction plugins, such as Noiseware or Noise Ninja.  Neither has this sample been sharpened!  Not bad.  Not bad at all…

For outdoors use, the 7D should prove to be a very capable camera indeed.

Tigers vs. Sooners Women’s Basketball & The X-Rite Color-checker Passport

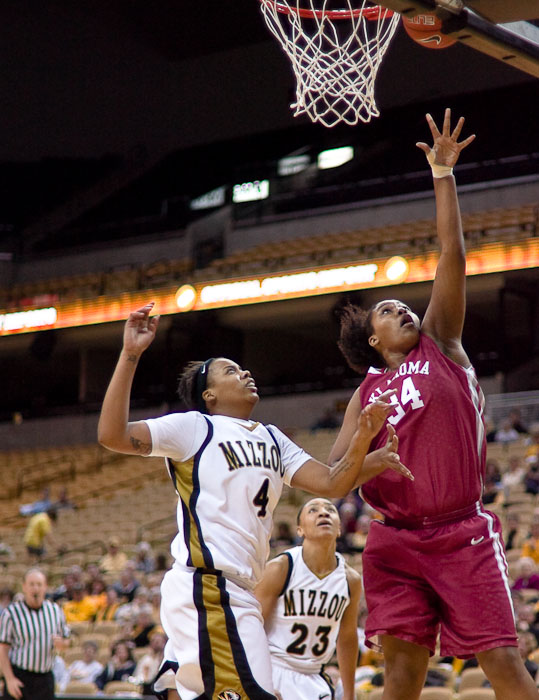
Missouri women's basketball forward Jessra Johnson, left, fails to prevent Oklahoma's center, Abi Olajuwon, from making a two point shot on Wednesday, 20 Jan. 2010 at Mizzou Arena in Columbia, Mo.
Missouri women’s basketball forward Jessra Johnson, left, fails to prevent Oklahoma’s center, Abi Olajuwon, from making a two point shot on Wednesday, 20 Jan. 2010 at Mizzou Arena in Columbia, Mo. Olajuwon wears the same number as her father, Hakeem “The Dream” Olajuwon, from his college career. The Tigers lost 61-62 to the Sooners. | Canon 1D IIn and 50mm f/1.4 lens; exposed 1/1250 sec. @ f/1.4, ISO 800. | Color corrected with X-Rite Color-checker Passport.

The Set-up

Last Wednesday I found myself sitting on the court at Mizzou Arena in Columbia, Mo. with two different camera bodies and three different lenses.  So, what’s the problem?  The 7D and the 1D Mark IIn see colors differently.  Add to the equation that the glass in a lens affects the color rendered in the final photograph.  For newspaper photography, usually captured in JPEG instead of RAW, this is just something you would normally “live with.”

Maybe you’d just take two identical bodies and figure no one will notice the difference once its printed on Charmin, any ways.  But online, the differences can be stark.  Take, for instance, this Columbia Missourian slideshow where I was using my 7D and a 1D Mark III on loan from CPS, but my colleague Chris Dunn was using an older D2Xs body at the football game between MU and Kansas State.  This is an extreme example, but it is amusing to watch Kansas State’s jerseys suddenly jump from purple to blue depending on which camera was used.  Hint: Nikon didn’t figure out what purple “looked” like until the D3 and D300 came out.

Article continues!

Continue reading “Tigers vs. Sooners Women’s Basketball & The X-Rite Color-checker Passport”

Unseasonably warm for Thanksgiving

Les Bourgeois Winery, Rocheport, Mo.  Canon 7D and 16-35mm f/2.8 L II lens @ 16mm; exposed 1/500 sec. @ f/14, ISO 400
Les Bourgeois Winery, Rocheport, Mo. Canon 7D and 16-35mm f/2.8 L II lens @ 16mm; exposed 1/500 sec. @ f/14, ISO 400

A belated Happy Thanksgiving to American readers of this blog.  Here in Columbia, Mo., the weather has been ridiculously warm, with today reaching 71 degrees Fahrenheit.  The past few days have been fairly relaxing–a welcome reprieve from the rest of the semester.  I have mostly been using the 7D to continue my evaluation of the body.

Of particular interest to me was the usefulness of the new built-in wireless transmitter for the Canon speedlite system, shadow noise, and live-view functionality.

More after the jump!

Continue reading “Unseasonably warm for Thanksgiving”

Bassnectar & the continuing story of the 7D

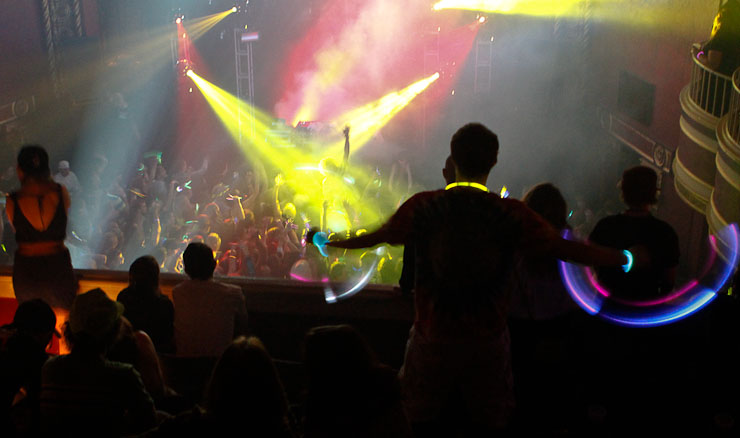
Fans wave glow sticks on the balcony of the Blue Note at the start of the Bassnectar concert, fashioned to be like a rave party.
Fans wave glow sticks on the balcony of the Blue Note at the start of the Bassnectar concert, fashioned to be like a rave party, on Friday, Nov. 20, 2009 in Columbia, Mo. / Canon 7D and 24-70mm f/2.8 L lens @ 24mm; exposed 1/8 sec. @ f/2.8, ISO 4000.

Last Friday I was assigned by Vox Magazine to go to a pseudo rave at a Bassnectar concert held at the Blue Note, a theater-like venue here in Columbia, Mo.  I decided to pack the 1D Mark III and the new 7D, leaving my 5D II on the shelf at home.  While it is a great camera in low light, I was more interested to see how the other two would perform as they are both relative “unknowns” to me.  Risky?  Sure.  But I figured it made sense to have one pro body with me, and my own 1D IIN is terrible in poor lighting conditions.  The only rule imposed on me was “no flash.”  This was going to be ISO 3200+ territory.

More photographs after the jump!

Continue reading “Bassnectar & the continuing story of the 7D”

Missouri Tigers’ victory over the Kansas State Wildcats – A Story of Two Cameras

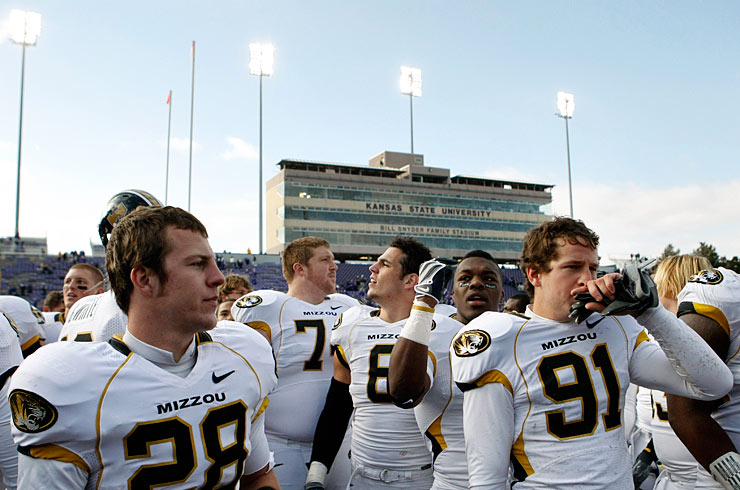
Contemplating victory / Canon 1D Mark III and 24-70mm f/2.8L lens @ 24mm; exposed 1/4000 sec. @ f/4, ISO 1000
Left to right: T.J. Moe, Kirk Lakebrink, Andrew Gachkar, Donovan Bronner, and Tanner Mills take a moment after their victory over the Kansas State Wildcats at the Bill Snyder Family Stadium on Nov. 14, 2009 in Manhattan, Kan.  Missouri defeated Kansas State 38 to 12. / Canon 1D Mark III and 24-70mm f/2.8L lens @ 24mm; exposed 1/4000 sec. @ f/4, ISO 1000

Preamble

I began to write this from up in the press box at the Bill Snyder Family Stadium.  The game had ended a couple of hours before–Missouri won 38 to 12, with most of the points racked up in the second half.

I used two camera bodies (initially I planned to use three, but I loaned my 1D IIn to my colleague whose camera was down to half battery before the game even started): my new 7D, and a 1D Mark III on loan Canon Professional Services.  While I don’t like many parts of the Mark III, especially the way in which one chooses the focusing point, and I am wary of its ability to autofocus given its less-than-stellar history in this regard, I love the way that files look from the Mark III.  And, besides, it’s about to be replaced with Mark IV bodies, so I figured I’d give it a chance as the used market is about to be flooded with them.  And wow, was I surprised.

More after the jump!

Continue reading “Missouri Tigers’ victory over the Kansas State Wildcats – A Story of Two Cameras”

Follow-up: Apple Cinema 24″ versus HP LP2475w 24″

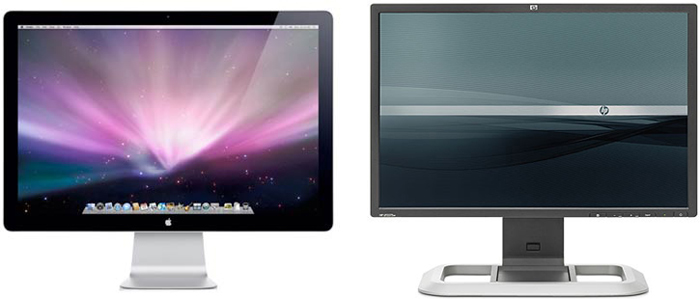
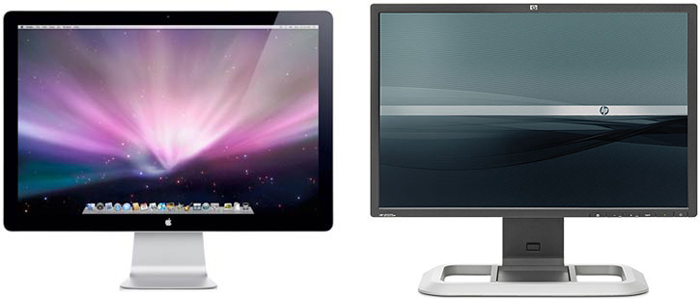
Apple LED Cinema versus the Hewlett-Packard LP2475w
Apple LED Cinema versus the Hewlett-Packard LP2475w – Part Two

After posting my brief comparison of the color gamut displayed by the Apple 24″ LED Cinema Display and the Hewlett-Packard 24″ LP2475w, I was asked if the comparison was fair as the computers used to build the profiles of the two monitors were different.  While the only piece of hardware that truly matters when comparing the profiles built is the display adapter (video card), this component was, indeed, different between the HP laptop and the MacBook Pro.

In addition to comparing the color gamut of the monitors to the Adobe RGB color space, which is used by many digital SLR cameras, I was also asked what ramification viewable gamut had on printing using Epson 4000 and Epson 4800 print engines.  I compare the gamut viewable by the monitors with Epson’s ICC profiles (for both printers) of Enhanced Matte Photo Paper and Premium Luster Photo Paper, both of which now have strange names: Ultra Premium Presentation Paper Matte and Ultra Premium Photo Paper Luster.

Method:

The equipment used for this comparison was  a MacBook Pro v3.1 (with a DVI connection) with an nVidia GeForce 8600M GT video card, an Intel Core2Duo 2.2 GHz processor and 2GB RAM running OS X 10.5.8.  The calibration unit remained the same as in the previous comparison: a Gretag-Macbeth / X-Rite Eye One Pro spectrophotometer.

Unlike the laptop used for the previous comparison, the DVI connector meant that there was no obvious way to connect the MacBook Pro to the new Apple 24″ LED Cinema Display, which has only a “Mini DisplayPort” connector.  To overcome this problem, an Atlona AT-DP200 Mini DisplayPort to DVI adapter bridged the gap between the monitor and the laptop.  So long as an older style MacBook is plugged into the monitor with this adapter–and the USB cable from the monitor is also plugged into the laptop–the user has complete control over resolution and brightness.  There are no color controls, unlike the HP monitor, but this has been true of all cinema displays from Apple over the past few years, and that did not stop many a PC user to purchase an Apple screen.

The ICC color profiles created by the Eye One Match 3 software were then compared using a trial version of Gamutvision 1.3.7 with a rendering intent of “None” on a two-dimensional XY Chromaticity (saturation map) projection.

Results after the jump!

Continue reading “Follow-up: Apple Cinema 24″ versus HP LP2475w 24″”

Apple Cinema 24″ versus HP LP2475w 24″

Apple LED Cinema versus the Hewlett-Packard LP2475w

Preamble:

I really don’t review many products except those that I own and use.  However, an opportunity arose at the University of Missouri to compare, side-by-side, the Apple Cinema LED monitor (selling for $860) with what has been my workhorse monitor over the past year, the Hewlett-Packard LP 2475w (selling for $550).  (You can read my earlier review of that monitor here.) Physically, there are a lot of differences between these two monitors, and one of those differences might actually play a role in performance.

First and foremost, the “looks” category goes to the Apple display.  That said, the Apple LED display comes only in a glossy screen.  Eek!  Everything about its design was appealing up to that point.  The HP monitor is very straightforward, no-frills, and with lots of buttons for accessing its menu, switching to different inputs (it can accept VGA, DVI, Component Video, HDMI, DisplayPort, etc., etc.), and, of course, switching it “off.”

The Apple monitor has no buttons, and can only connect via “Mini DisplayPort,” which is currently found only on the latest Mac products.  I can only surmise that Apple and its shareholders were sick and tired of the entire world of photographers on budgets buying their screens, and making money for the company.  </satire>  Furthermore, the lack of a menu in which one can control brightness, contrast, and the red, green, and blue outputs is sorely lacking.

As this is a short review, I’ll get to the meat of the comparison (after the jump!):

Continue reading “Apple Cinema 24″ versus HP LP2475w 24″”

Review: MSI Wind Netbook

I suppose there are two schools of thought about laptops: that they should be as lightweight and as small as possible, capable of basic tasks, and thus work in tandem with much more powerful desktop computers. Alternatively, a laptop can be a complete replacement for a desktop computer, with a large screen and full-size keyboard.  The greatest price paid for the latter is, in my opinion, its significant weight (although the size is a close runner-up).

I much prefer smaller machines, as I do not trust even the “best” laptop screens to be completely color accurate, even after calibration with some of the best software and hardware on the market.  Instead, I would rather edit in the field and come home for toning and final processing on my 24″ monitor of choice, the HP 2475w.

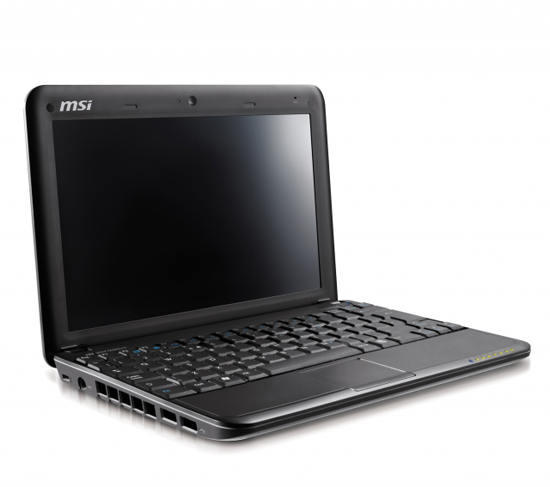
This past June, as part of my preparation to travel to the Galapagos Islands with my dad on an Arthur Morris-led trip, I purchased an MSI Wind U100 “netbook” for only $299.  While I own a relatively compact laptop that weighs in at 5 pounds, I wanted to minimize weight as much as possible, especially as I did not expect to have enough time to do more than a basic edit of my shoots in the Galapagos using Breeze Browser.

The MSI Wind U100 is compact at 10.25 x 7.125 x 1.125″ and weighs 2.8 pounds with its standard battery.  It features a wonderful 10″ anti-glare screen that is also very bright and easy to read both indoors and, shockingly, outdoors.  My Wind came with a 1.6 GHz Intel Atom processor, a 160gb hard drive and 1gb RAM.  My Wind does not have built-in Bluetooth, but I purchased a cheap USB adapter on eBay that seems to be working just fine with my Bluetooth mouse.  As the Wind comes with three USB ports, sacrificing one for this purpose is not a great deal for me.  However, more expensive models include built-in Bluetooth.

I added a second gigabyte of RAM for only $14 at NewEgg, although installing it invalidated the warranty.  This is undoubtedly the low-point of this netbook: the warranty should not have to be forfeited for the ability to modify the internal hardware.  Other manufacturers add separate ports on the bottom of their laptops to access crucial places like the hard drive and RAM.  However, I am comfortable living with this weakness as the overall strengths of the netbook are significant.

The MSI Wind boots quickly into Windows XP and is an ideal station for, well, “net” browsing and e-mail.  Combined with software like Breeze Browser, or similar products like Photo Mechanic, I have to say that this is a very capable photo editing platform.  Keep in mind that I am using “editing” in the sense of going through all of the images from a shoot and selecting the best–I am now going through these selects on my desktop and toning them.

For such a lightweight and economical laptop ($299), I have found it to be completely indispensable and will be a part of my photography kit for the foreseeable future.

If you find this review useful and choose to buy the MSI Wind for yourself, I would greatly appreciate  your making the purchase through my links to Amazon.com.