The Set-up
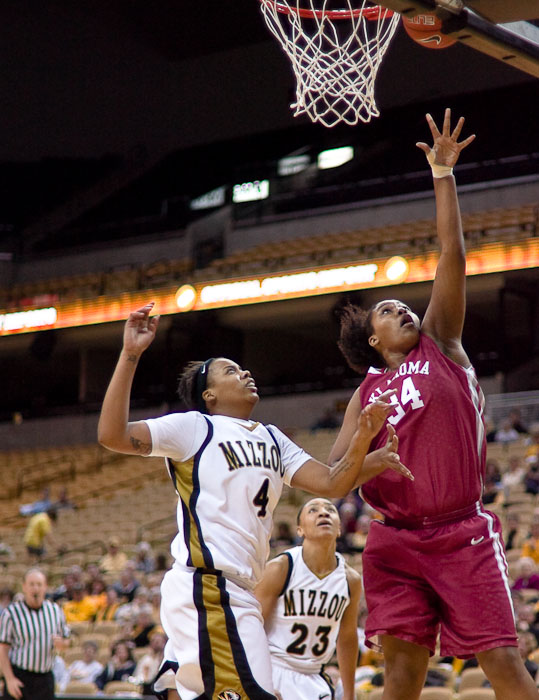
Last Wednesday I found myself sitting on the court at Mizzou Arena in Columbia, Mo. with two different camera bodies and three different lenses. So, what’s the problem? The 7D and the 1D Mark IIn see colors differently. Add to the equation that the glass in a lens affects the color rendered in the final photograph. For newspaper photography, usually captured in JPEG instead of RAW, this is just something you would normally “live with.”
Maybe you’d just take two identical bodies and figure no one will notice the difference once its printed on Charmin, any ways. But online, the differences can be stark. Take, for instance, this Columbia Missourian slideshow where I was using my 7D and a 1D Mark III on loan from CPS, but my colleague Chris Dunn was using an older D2Xs body at the football game between MU and Kansas State. This is an extreme example, but it is amusing to watch Kansas State’s jerseys suddenly jump from purple to blue depending on which camera was used. Hint: Nikon didn’t figure out what purple “looked” like until the D3 and D300 came out.
Article continues!
A Solution

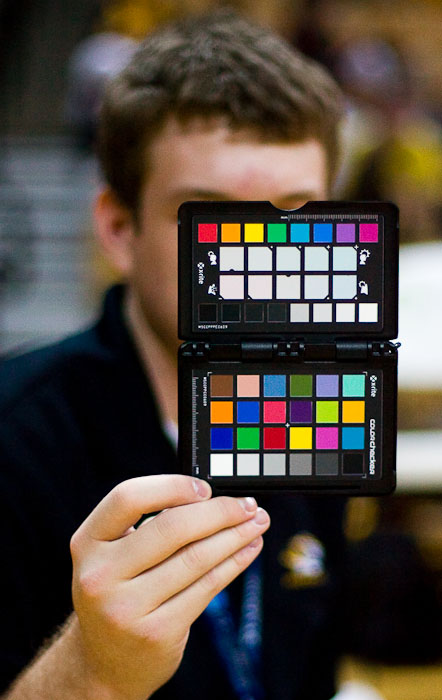
I first read about the X-Rite Color-checker Passport back in early November when Michael Reichmann posted his own review of the product. Essentially, it is a miniature Gretag-Macbeth color chart in a collapsible, hard, plastic case. It features a white balance target, as well as a set of “warming” and “cooling” white balance squares (when neutral simply isn’t the look you want).
But the magic of the chart isn’t that you have an idea of how color should be rendered in a certain space, like Mizzou Arena. No, the power of this tool is that it integrates with Adobe Lightroom, and can be used to make individual camera profiles. The only catch is that the photographs must be captured in RAW in order to take full advantage of this tool.
For some people, including many of the people I work with at the University of Missouri, that would be a deal-breaker. However, for anyone who is truly serious about color management, this is an obvious tool to have, and it actually speeds up your toning workflow. You profile your monitor (you do profile your monitor, right?), you can calibrate your printer for specific paper types, why not calibrate your camera, too? Fortunately, X-Rite makes the process fairly simple.

Procedure
It really makes the most sense to use the Color-checker Passport when you know that the color is important (studio work comes to mind), or you want consistency across two cameras. For a basketball game, 100% accurate color doesn’t really matter. However, I wanted to confirm that this tool really could help to “sync” the color between the two bodies.
First, you photograph the target with each camera and lens combination you plan to use under a given lighting situation. The target should take up at least 10% of the viewfinder, so it need not be frame-filling to work, although it doesn’t hurt if it does. While you’re at it, flip the chart around and shoot the white balance target. Make a custom white balance from this target. Make your pictures.
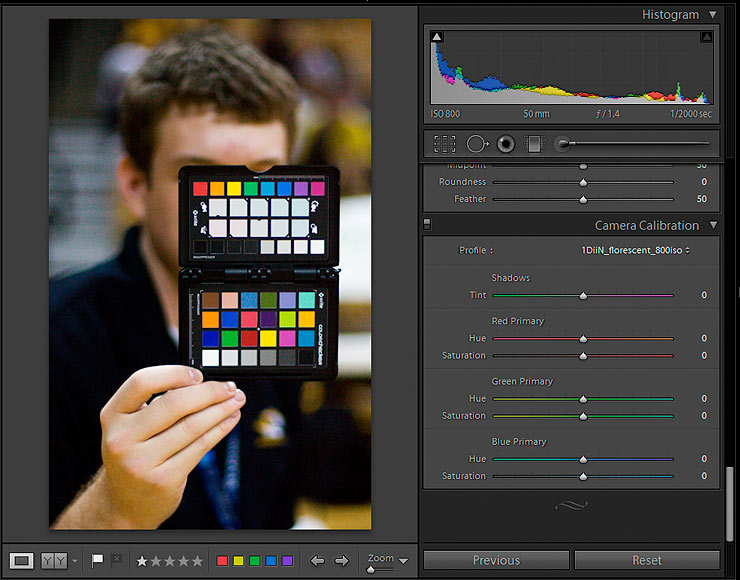
When you get home, download everything into Lightroom and find your Color-checker Passport images. To create a profile, all you do is click on “export,” and use X-Rite’s plug-in to make the camera profile. It chugs away while you continue sorting your pictures before alerting you to the successful creation of the profile. Lightroom must exit and restart in order to find the profile that was created. It is then accessible at the bottom of the “Develop” tab, under “Camera Calibration.”

At this point, if you don’t find the results to be completely accurate, you can still adjust the tint and saturation of the RGB sliders. This setting can then be copied and pasted into the other photos made with the same camera and lens combination, or you can even make it a Develop Preset. If you really want, you can have this camera calibration the new default for that camera body, although I would prefer to stick to Adobe’s own dual-illuminant DNG camera profiles as the default.
Dual-what?
When you select “Adobe Standard” as the camera profile in “Camera Calibration,” you are choosing a Dual-Illuminant DNG profile. All of the profiles built by the X-Rite software are based on the open DNG RAW format. The difference between a normal and a “dual-illuminant” profile is better explained in practice.
There are two possible routes for using the Color-checker Passport: to make individual profiles for specific lighting conditions and lenses, or to make a profile that understands two lighting conditions all in one. That is, you could make one profile that understands daylight and tungsten lighting. But wait, there are so many variations in tungsten lighting! Why not make a profile to cover two extremes of tungsten light? And another that handles the extremes of florescent bulbs–to the super-green grocery store light tot the nearly tungsten? The possibilities are (sort of) endless.
I have only worked with the normal profiles so far, but plan to build my own dual-illuminant profiles soon.
A Quirk of Note
I have found that, on occasion, the Lightroom plug-in fails to generate a profile. This seems to happen more with my Panasonic G1, the Olympus PEN Ep-1, and also my Canon EOS 7D files. The solution that I have found is to manually export a DNG file that you specify to be compatible with versions 4.x and earlier, and creating the profile with the desktop version of the X-Rite plug-in. X-Rite does appear to be aware of this issue and will likely release a patch soon.
Bottom Line
When all is said and done, I think that the X-Rite Color-checker Passport is a surprisingly useful tool, especially for color-management gurus. How useful? The only difference between the images below, from the 1D Mark IIn, left, and the 7D, right, from the ones displayed earlier in this article is that the “Camera Calibration” has been set back to the Adobe default. Suddenly, Oklahoma’s jerseys don’t match across the two pictures. Would some toning fix it? Sure, but this way, a step is simplified in the workflow–and it’s quickly and easily applied to all of my pictures from the event.
Shameless Plug: If you decide to purchase a Color-checker Passport, please consider doing so either through my referral links to B&H or Amazon.com.


[…] even special event photographers can benefit from using the Passport. Here’s a report from a sports photographer who used the Passport to create colour profiles […]