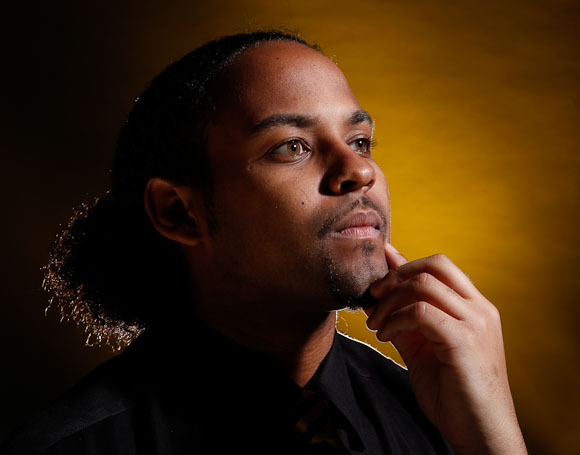
This past weekend I photographed Jarrad Henderson, a fellow photojournalism masters student at MU. It was a class assignment to make a portrait first with a single strobe, and then with multiple lights. That’s where the fun really began. The only problem is that I have two images that I like, so it’s hard to choose!
Ultimately, I believe this first image is the more successful of the two:

More after the jump.
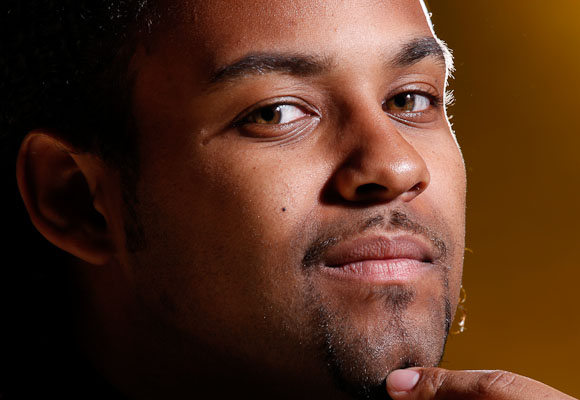
The second portrait, below, represents an idea closer to what I would do in nature/wildlife photography: go for tight portraits with clean backgrounds. I didn’t actually try this composition until the very end, and only captured a handful of frames. In retrospect, I should have worked this a bit more while I was in the studio, because it shows promise.
The reason I do not consider it to be as successful is that the rim lighting is not quite as effective (not as complete). Also, it is illuminating some distracting hairs to the lower right. (It’s not his beard, but his long hair unfortunately framed!) I’ve also had to crop it much tighter than I wanted to, because I did not notice the position of a light stand–growing out of his chin!–until it was too late. However, the tight crop gives me an idea for a similar portrait, just without Jarrad touching his chin.
I show it because it demonstrates what would be a good idea, if done a little more purposefully.

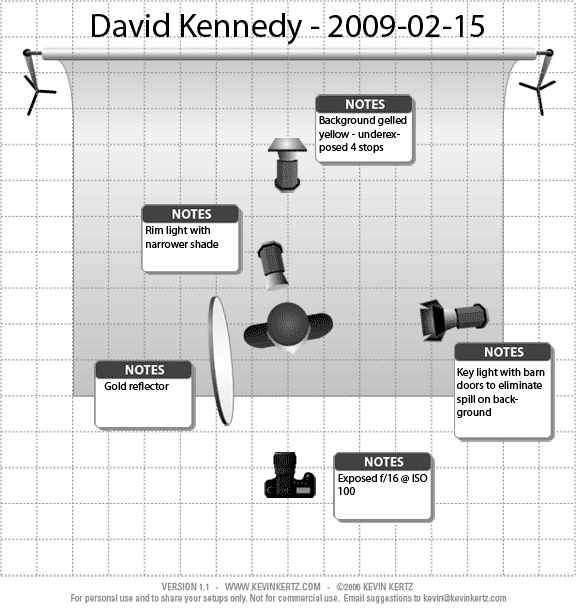
Finally, I come to how these two images were made. A light in the back, gelled yellow, was projected upwards onto the gray seamless. The key light was a strobe on a stand with barn doors to keep the light from spilling onto the background; light from the key was then reflected back onto the “unlit” side of his face, giving me a lighting ratio of 4:1 (f/8 versus f/16). Finally, a third light was positioned directly behind him for the rim “effect.”


Definitely the first one. Nice job.
Ultimately I think you have a good portrait here… I’m really no expert, but I think in any portrait, posing is the most difficult to comprehend and conquer. I like the tight crop, and you are right about the hand and the hair, but probably would have been worth taking some more frames…
I like the colours you have chosen for the backdrop and gel, although in the first photo, I think the rim lighting is a bit distracting because it’s the wrong colour. Could you have gelled that one too? Overall I think you’ve done a great job, and has given me ideas for my own studio set up, Many Thanks,
Barry