Back-focused? Front-focused? A Solution: A Review of the LensAlign Pro in Two Parts

Part Two:

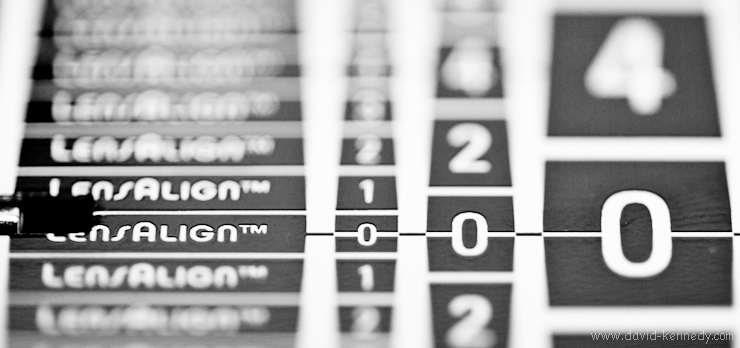
LensAlign Pro ruler
LensAlign Pro ruler

This is a continuation of my two-part review of the LensAlign Pro.  You may wish to refer to part one before continuing!

Final Preparation for Testing

So you’re set: you’ve calculated the distance you need, set up your camera on a tripod (and possibly placed LensAlign on another tripod or a sturdy table), and you’ve confirmed LensAlign is square to the camera/lens in Live View or by zooming into a review image. What now? Close the Sight Gate so that your camera cannot focus on the rear standard of the LensAlign.  Set the ruler to the third position (20 degrees) for initial testing.  Ensure that you are set to you lens’ largest aperture; if you’re calibrating a 50mm f/1.4 lens, you need to be shooting at f/1.4.  Expose properly for your lighting situation–you do not want overexpose the ruler!

A Brief Note on Technique

Even though you’ll be working on a tripod at reasonably fast shutter speeds, I find it can help to set the camera in mirror lock-up with a two-second countdown timer when working with 70-200mm lenses and smaller. For larger lenses with tripod collars I switch out the ball head for a gimbal-style head and employ the long-lens techniques I’ve learned from Arthur Morris: I lock down the lens with my arm hooked around the head and down onto the lens while applying pressure to the top of the camera with my forehead as I look through the viewfinder.

To make the test image you will manually rack the focus so it’s blurred, and then have the camera autofocus on the center of the target: you want the camera to have to “work” to get the image in focus. Make an image and review it.

For now, I’m going to assume you are using a prime lens.  Check the LensAlign Distance Tool for a calculation of how much DOF should extend in front and back of the focus target (0 mark on the ruler).  For this example I will assume the calculation is close to 50-50.  The first thing you need to determine when looking at the review image is where the DOF begins and ends, bearing in mind that you want the DOF to split evenly on the top and bottom halves of the ruler.

When you’re reading the ruler, look for noticeable crispness in the numbers, starting with the large ones.  Is the “8” sharp on both the top and bottom?  How about the “6” or the “4?”  Sometimes, the larger numbers are a bit confusing, but as your eye scans the ruler, look at the columns of smaller numbers and ask yourself what is the last number you can read clearly on the top of the ruler, and then look and compare that to the corresponding number on the bottom of the ruler.

If you think the numbers on the ruler are hard to read, or that it is difficult to tell where the boundaries of the DOF lie, try adjusting the ruler angle.  Rarely do I use the first (45 degrees) or second (30 degrees) position, but I frequently will make the angle harsher and go to the fourth position (12.5 degrees) to camera.  Especially for longer lenses, a shallower angle really helps to clearly spot the boundaries of the DOF.  Note that for those who want a longer ruler to judge autofocus on long lenses from greater distances than the proscribed eight feet per 100mm of focal length, the LensAlign Long Ruler Kit gives the Pro a larger focus target and a four-foot long ruler.

If the DOF is pushed to the top half of the ruler, your camera is back-focusing, and you will need to use a negative AFMA correction to “pull” the DOF back down the ruler.  If the DOF has mostly sunk to the bottom half of the ruler, your camera is front-focusing, and you will need to use a positive AFMA correction to “push” the DOF up the ruler.  If the DOF falls perfectly on both sides of the “0” mark of the ruler, then congratulations, you’re done with this lens, and can move on to the next!

Correcting Front or Back-Focus

Begin with a simple adjustment: one increment in the direction needed to correct the focus.  After setting the AFMA in the camera menu, turn the focus ring by hand so that the camera will have to re-acquire focus, and make a new test frame. (If you wish, you may alter the enumerator so that the AFMA is recorded in the frame.)  In my experience every lens/camera is different, and responds differently to AFMA corrections.  Sometimes, a +1 adjustment appears to have no effect in pushing the DOF up the ruler to correct front-focus, and it may take more drastic increments (+5, +10) to get into the ballpark.  Other times, the change is dramatic and +1 or +2 moves the DOF significantly.  Start small, and work your way up (or down) the AFMA scale until you find the right setting for your lens.

The following video is an example of one lens/camera combination where changes in AFMA were very, very slight, and it wasn’t until -18 that I found a good balance of the DOF on both sides of the ruler.  Here you will see it step-by-step, but in practice, I first attempted -1, then -2, and -5.  When no change was apparent, I jumped to -10, and then to -15.  From there I went step-by-step until hitting -18, the “sweet spot.”

LensAlign Pro Demonstration from David Kennedy on Vimeo.

At 0 AFMA, the back-focus is quite significant, so you will only gradually see the numbers on the bottom half of the ruler come into focus in balance with the focus on the top half of the ruler (achieved at -18 AFMA).

What about zoom lenses?

Put simply, calibrating zoom lenses is a balancing act.  Most cameras provide only one AFMA per lens (Olympus seems to be the exception to the rule), but zoom lenses comprise a great number of focal lengths!  Test the focus performance of the lens at some of its designated focal lengths marked on the barrel; on a 16-35mm lens, you might test at 16mm, 24mm, and 35mm.  Unfortunately, the AFMA that is ideal for one “end” of the zoom range might not be as good for the other.  In such circumstances, you will have to make a choice of which one is more important to you for that lens.

For instance, I have both a 16-35mm lens and a 24-70mm lens, and there is obvious overlap between the two.  When calibrating my 16-35mm, I found that the ideal AFMA for the 16mm setting resulted in severe front-focusing at 35mm.  However, my 24-70mm lens works quite well throughout its zoom range, so I decided to keep the setting on my 16-35mm to make the widest end perform the best, knowing that if I want to zoom in longer than 24mm I will change lenses.

Using the Emboss Filter
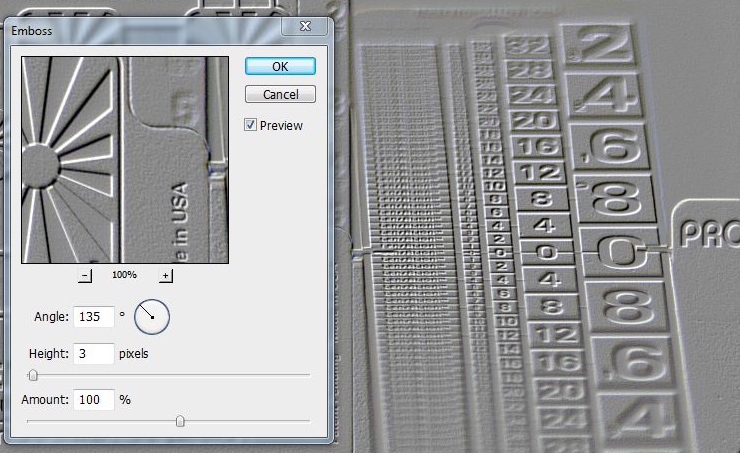
Photoshop Emboss Filter Dialog
Photoshop Emboss Filter Dialog Box: Angle 135 Degrees, Height 3, Amount 100%

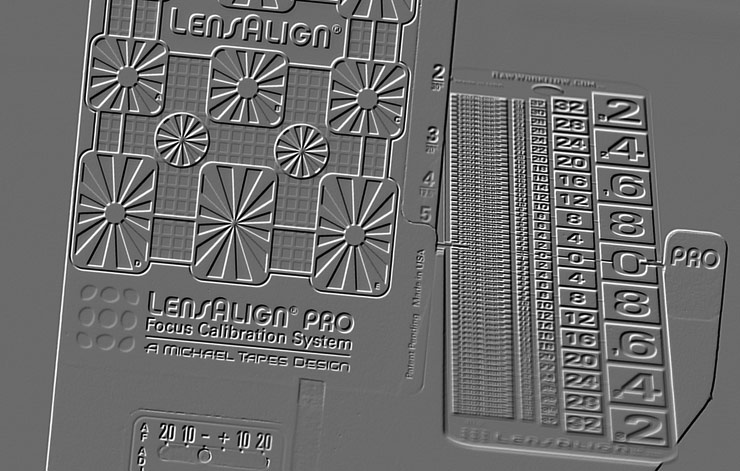
Whether reviewing the images on the back of the camera or on a computer, there are times when it is less obvious which AFMA correction offers the very best balance of DOF on both sides of the ruler.  When trying to choose between two or three AFMA settings, try loading the photos into Adobe Photoshop and applying the emboss filter with an angle of 135 degrees, a height of 3, at an amount of 100%.  The “relief” image you will create can help identify the exact edges of the DOF.
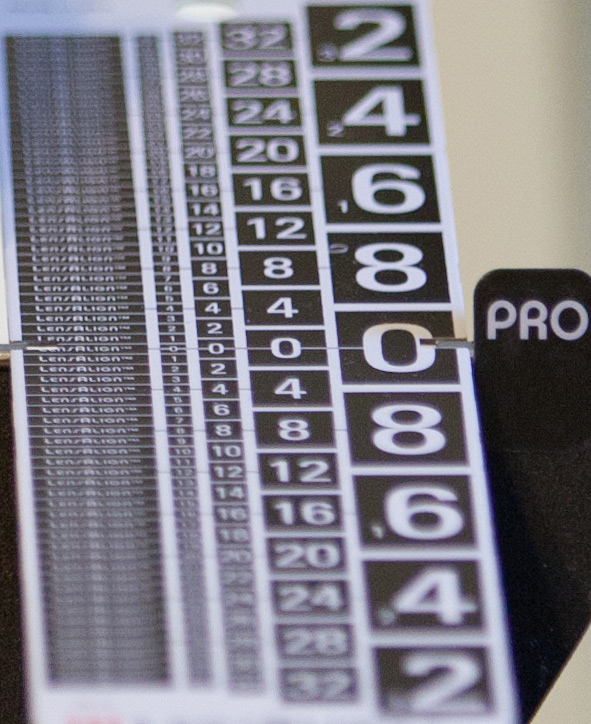
Lens Align Ruler
Lens Align Ruler: Hover over the image image to see it with the emboss filter applied. Note that the back-focus issues are more visible in the embossed version. Compare the large 8’s and the medium-sized 12’s to see how the “top” numbers are sharper than those on the bottom half of the ruler.

How long does calibration last?

For a while I believed that AFMA is something you could “set and forget.”  There are exceptions to this, of course: every time you send in a camera or lens to the manufacturer for service you should put it back on the test bench with the LensAlign. Do not be fooled if the AFMA changes are still in the camera you just had returned from the factory: test and verify for yourself that they still work well.  This happened to me in the fall of 2010 when I sent in my Canon 5D Mk. II for a “clean and check” and it was noted that autofocus had been re-calibrated at the factory.  The body came back wiped but with AFMA changes still registered, but they were no longer ideal adjustments: I had to calibrate my lenses all over again.

There are times when the ideal AFMA setting may shift for a host of reasons that are beyond a user’s control.  It would seem to me that testing AF performance on a quarterly basis is an easy rule of thumb that most users can follow, but for professionals a more proactive approach might be needed.

In talking to Michael Tapes, he offered the following advice: calibrate using LensAlign before any big shoot (travel, a high-paying portrait shoot, etc.) and then again a month later.  Wait two months from that day and confirm if the AFMA is still working for your camera/lens combination.

Conclusion

The LensAlign family is products is, for the moment, the only game in town for accurate autofocus micro-adjustment calibration.  None of the major camera manufacturers have a consumer product to use with their micro-adjustment-capable cameras, and it wouldn’t appear that any of them intend to fill the void that they created when they released a feature with no corresponding tool.  Yes, Datacolor is attempting to compete with the Spyder Lens Cal, but their product has no means of squaring the target to the camera, making it pretty much useless.  It simply doesn’t provide the accuracy or repeatability that you find in Michael Tapes’ LensAlign.

The good news is that even if LensAlign is the only practical tool available, it’s a good one.  The LensAlign Pro is a very sturdy and capable product: squaring it to the camera is fast, the ruler can be locked into several different angles so you can adjust the experience to your preference, and the handy enumerator makes visual “note taking” of distances and AFMA settings a snap.  At $180 the LensAlign Pro is not an inexpensive product, but  this is not another injection-molded plastic wonder: each one is assembled by hand individually in the United States and then laser-tested for accuracy.

The disadvantage of the LensAlign Pro is that its sturdiness and size means that it doesn’t travel well: it’s a unit that stays home or can be packed in a car, but air travel is almost entirely out of the question.

Michael Tapes clearly recognized that retail price was an issue for some people, and the size of the LensAlign Pro meant that shipping internationally was a problem for the company, so he created a new stablemate, the LensAlign MKII.  The new product sells for $80 and offers much of the same functionality as the LensAlign Pro in addition to packing flat both for shipping and travel.  A review of the MKII will be posted here before the end of the month, but in short new product is essentially a scaled-down, less expensive LensAlign Pro.  There are some advantages to the bigger brother, however, and as Michael Tapes explained over the phone people will buy the LensAlign Pro if: “They want the enumerator, they want the ruler angles, or they want the 4-foot ruler.”

The bottom line is that if you are serious about getting the sharpest images from your micro-adjustment capable camera, you cannot go wrong with the LensAlign Pro.  Highly recommended!
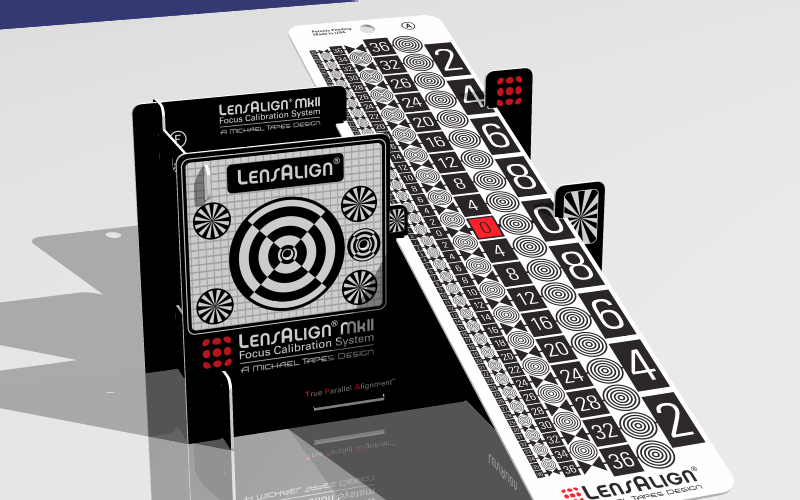
Another option for focus calibration: LensAlign MkII

LensAlign MkII rendering
LensAlign MkII rendering courtesy RawWorkflow/Michael Tapes

Michael Tapes, the entrepreneur who invented the “LensAlign Focus Calibration System” e-mailed me a few weeks back and said that he had a new product coming, but by reading the information I was under a NDA.  However, many of the details of the LensAlign MkII, which replaces the LensAlign Lite (I reviewed the LensAlign Pro earlier this fall), are available on Michael’s blog.  I just received a prototype yesterday, and will be writing a review of the new product and comparing it to its “bigger brother.”  Final production versions will retail for $79.95 and will ship in the United States for $6 as it comes flat/disassembled to fit inside of a Priority Mail envelope.  This conceivably means that it can be taken apart easily for travel, something the LensAlign Pro simply cannot do.

Stay tuned for more!

On a fall day – Part Three

Fallen
Fallen, Sandy Creek Park, Durham, N.C. | Canon 5D Mk. II and 70-200mm f/2.8L IS Mk. II lens @ 160mm | Exposed 1/60 sec. @ f/2.8, ISO 800

Parting Thoughts on the 70-200mm f/2.8L IS Mark II lens

When I first received the new 70-200mm lens from Canon Professional Services, I was instantly reminded why I sold my old 70-200mm f/2.8 (non-IS) a few years ago: it’s big and it’s heavy.  But it lets in a lot of light, and you can achieve very nice, selective focus with it.  I didn’t have  an opportunity to make any portraits with it, which is too bad because I think it would be an excellent lens for that application.  I did take it out on the street, but I was very conscious of walking with an enormous white monstrosity: subtlety is not an option with this lens.

A Worthwhile Upgrade?

The image quality is remarkably high (although I wouldn’t consider its resolution to be any greater than it’s f/4 stable-mate, and while the image stabilization is improved over the previous version, I did not think it any better than the aforementioned 70-200mm f/4L IS.  That said, this is the first zoom lens that I would consider using with the 2x teleconverter on a regular basis.

If you currently own the older IS version of this lens, you might wonder if it’s worth the upgrade.  I would offer that I believe the image stabilization is certainly better, but if you shoot sports, that might not matter to you at all.  The image quality is higher, and will enable you to use the 2x teleconverter freely.  If neither of these features interest you, then you can probably pass on this lens and wait for something “better.”

Scattered leaves floating in the water
Scattered leaves floating in the water, Whippoorwill Park, Durham, N.C. | Canon 5D Mk. II and 70-200mm f/2.8L IS Mk. II lens @ 80mm | Exposed 1/40 sec. @ f/3.5, ISO 400

On a fall day – Part Two

Fall leaves
Fall leaves, Sandy Creek Park, Durham, N.C. | Canon 5D Mk. II and 70-200mm f/2.8L IS Mk. II lens with 2x II TC @ 320mm | Exposed 1/400 sec. @ f/8, ISO 200

Experimenting with the 2X Teleconverter

Over the weekend, Arthur Morris posted on his blog that he was experimenting with the new 70-200mm f/2.8L IS Mk. II lens with Canon’s 2x II teleconverter, which turns the lens into a 140-400mm f/5.6 lens.  When using this combination, the short end should be avoided with this combination because 140mm is encompassed by the lens’ natural zoom range.  I was intrigued by Artie’s post because he was so excited by the image quality he was getting with this combination, and since I had such a lens on hand from Canon Professional Services, I thought I’d go out and give it a try, and I was impressed: it is sharp, and it works well!

Now, I could do this with my 70-200mm f/4L IS lens, but then I’d be working at f/8, and would have to stop down to f/11 to overcome the vignetting that is inherent to working with teleconverters, so I usually only work with the 1.4x TC.  The bottom line is that this is a surprisingly useful application for the new zoom lens, especially for nature photographers, but for most other forms of photography as well.  I certainly wouldn’t argue it’s “as good” as having a 300mm prime and a 400mm prime lens, but not everyone carries those two lenses with them daily!

Maple leaf
Maple leaf, Sandy Creek Park, Durham, N.C. | Canon 5D Mk. II and 70-200mm f/2.8L IS Mk. II lens with 2x II TC @ 342mm | Exposed 1/320 sec. @ f/11, ISO 250

Scenes from town

Walking back from the show
Walking back from the show: two men walk back from the Durham Performing Arts Center after seeing the musical "Billy Elliot" on November 7, 2010 in Durham, N.C. | Canon 5D Mk. II and 70-200mm f/2.8L IS Mk. II lens @ 200mm | Exposed 1/2000 sec. @ f/2.8, ISO 400

A few more images from my trial run with the new Canon 70-200mm f/2.8L IS II lens.  More to come!

Directing traffic
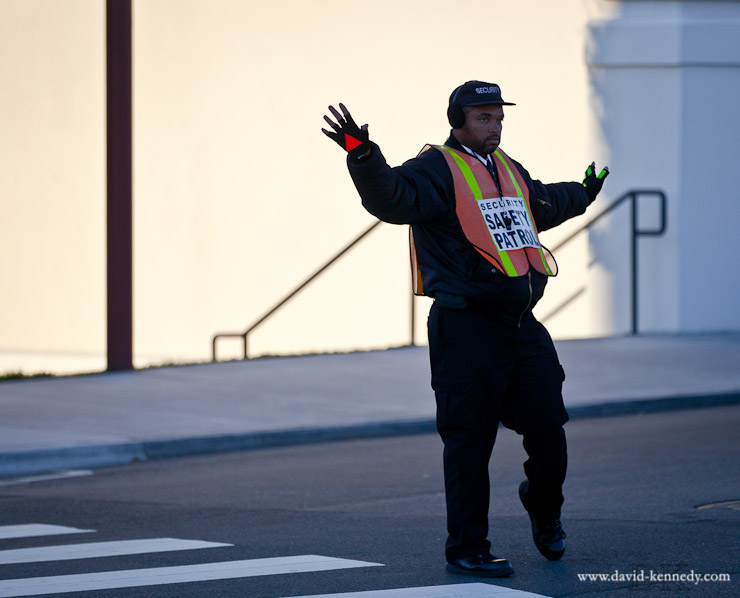
Directing traffic across Blackwell Street, Durham, N.C. | Canon 5D Mk. II and 70-200mm f/2.8L IS Mk. II lens @ 200mm | Exposed 1/6400 sec. @ f/2.8, ISO 400

Between poses

Between poses
Laughing between poses, Sarah P. Duke Gardens, Durham, N.C. | Canon 5D Mk. II and 70-200mm f/2.8L IS Mk. II lens @ 185mm | Exposed 1/320 sec. @ f/2.8, ISO 200

For the next few days I’ll be trying out the new Canon 70-200mm f/2.8L IS Mark II telephoto zoom lens care of CPS.  Once upon a time I had the non-IS version of this lens and, like this new version, it was big and heavy but achieved impressive results.  However, I sold that lens several years ago to buy a Gitzo tripod and the smaller and lighter 70-200mm f/4L, which I then sold to buy the 70-200mm f/4L IS two years ago.  I’ve also had access to the the lens that this “Mark II” replaces while I’ve been a student at the University of Missouri, so I’ve had a lot of experience with Canon’s lenses in this zoom range.

While I’ll have more thoughts in the coming days, I should note that of all of Canon’s black plastic detachable lens hoods, this is the best bar none.  It goes on smoothly and actually “locks.”  There’s a button on the lens hood that one has to depress in order to take it back off.  Nice.

By comparison, most of these black plastic lens hoods suck, as noted by Mark Dubovoy in an essay on the Luminous Landscape: “…all the typical Japanese lens hoods are way too flimsy and they are a veritable royal pain in the butt to take off, reverse, install and all that. They constantly refuse to go in, or go in crooked, or jam or break. It is a miserable bad design, with flimsy bad construction to make matters even worse.”  After several years of working with these hoods, and now that my 24-70mm’s hood only stays on if I use gaffer’s tape, I would agree whole-heartedly.  I can only hope that this new hood on the Mark II 70-200mm is a sign of things to come!

An old lens updated…and enlarged?

Science library at Noyce Hall, Grinnell College
Science library at Noyce Hall, Grinnell College, Iowa | Canon 5D Mark II and 24mm f/3.5L TS-E Mark II lens | Exposed 1/20 sec. @ f/3.5, ISO 100.

Lens envy is something every photographer experiences, and sometimes it’s made worse when a lens you love is replaced with a newer, more expensive version.  I suppose this is what people who have iPhone’s go through every June.

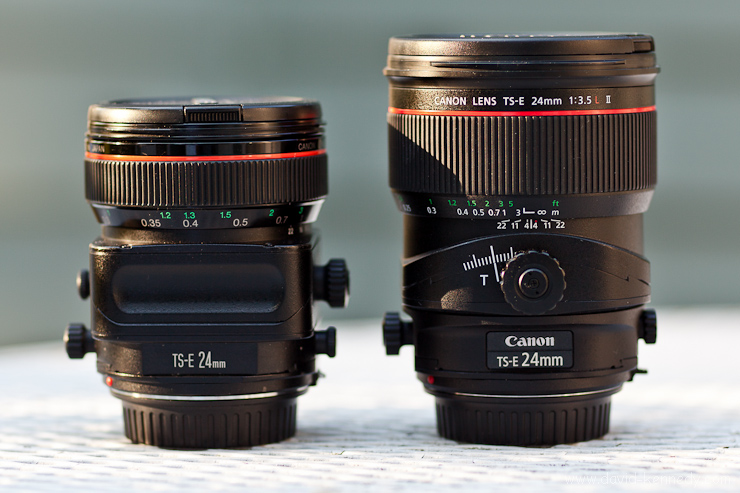
About five years ago I purchased a Canon 24mm f/3.5L TS-E lens for its ability to control perspective…that is, I wanted to get a view looking “up” at a building without the lines converging.  And it was a small, albeit dense, lens, so it was pretty easy to slip into a camera bag and take it along just in case a landscape or architectural situation demanded it.  But it had its flaws, chief among them being that the tilt (also known as swing) movement comes from the factory 90 degrees from the shift (rise and fall) movement.  That means that if you want to use shift to get a higher perspective, but also tilt the lens downward, then you’re out of luck unless you send the lens in to Canon to be altered so that they’re on the same plane.

Canon 24mm f/3.5L TS-E lenses
Canon 24mm f/3.5L TS-E lenses - the Mark II is on the right, and now takes an 82mm filter thread instead of the 72mm thread on the older version. | Canon 5D Mark II and 85mm f/1.2L II lens | Exposed 1/80 sec. @ f/2.8, ISO 100.

Continue reading “An old lens updated…and enlarged?”

Back-focused? Front-focused? A Solution: A Review of the LensAlign Pro in Two Parts

Part One: Overview and Setup

LensAlign Pro ruler
LensAlign ruler revealing a good balance of depth of field on either side of the “0” mark | Canon 5D Mark II and 100mm f/2.8 macro lens

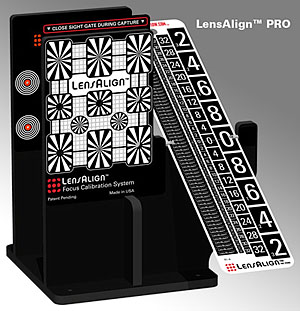
LensAlign Pro

LensAlign Pro
LensAlign Pro

Earlier this month, Michael Tapes, president of RawWorkflow, e-mailed me because he saw my mention of  Datacolor’s product, aimed to complete with his LensAlign, the Spyder LensCal. He also referenced my account of working briefly with one of his company’s LensAlign Pro units this summer.  Michael then offered  to have a review copy of the LensAlign Pro sent to me for a closer look at this useful, if somewhat expensive, tool for properly calibrating the autofocus performance of a camera and lens.

While many manufacturers, including Canon, Nikon, Sony, and Olympus, now provide a means for end-users to calibrate the autofocus performance their prosumer and professional cameras via “autofocus microadjustment” (AFMA), none of them offered a tool for making these changes in a meaningful way.

LensAlign, then, is a platform for measuring the focus accuracy of a camera/lens combination.  One takes this information and then, if necessary, change the AFMA to shift the depth-of-field (DOF) so that it straddles the “0” mark on the LensAlign ruler.  I will explain the overall functionality (although I do not intend to re-create the wheel–the LensAlign manual is on the company’s resources page) and consider why one would purchase such a product.

Debunking the 1:2 Depth of Field Myth

One of my initial concerns about this process is that I’ve heard for years–from anecdotes in photography books to some of my professors in graduate school–that depth of field is split in a 1:2 ratio around the point of focus.  That is, 1/3 of the DOF resides in front of where one focuses and the remaining 2/3’s lies behind it.  But LensAlign is designed to make the DOF 1:1 in front and back of the focus mark, which seemed to go against the grain.  Someone has to be wrong!

In researching this, I found a page of “Common photography myths,” and sure enough, number 14 was that DOF was 1/3 in front and 2/3 in back.  Essentially, DOF is mostly 1:1 front to back. However, as magnification is decreased (distance from subject becomes greater, i.e. farther back in the frame), DOF slowly grows to become closer to the 1:2 ratio of lore.  Then, as one focuses more towards infinity, the ratio becomes 1:∞, and hyperfocal distance is achieved.

The DOF ratio is not always 1:1, hence my saying “mostly.”  For example, with wide-angle lenses, particularly at close distances, the split becomes 40% in front and 60% behind the focus mark.  If you want to know more about how depth of field is calculated, you can find the formula here, and a list of known values for the circle of confusion of several camera models can be found here.

All this aside, I suppose if  one desires a 1:2 ratio for depth of field, one can use LensAlign to shift it to one’s liking, but it is a choice to alter the way that things are designed to work for one’s creative needs, it is not “the way it should be.”

Inside the Box & Initial Setup

Upon opening up the white clam-shell box, one finds the main unit, and a postcard detailing how to set up the following components:  its metal ruler, the “sight gate,” a magnetic on an adhesive strip for the “sight gate,” and four small, cylindrical magnets for use with the LensAlign’s “enumerator.”

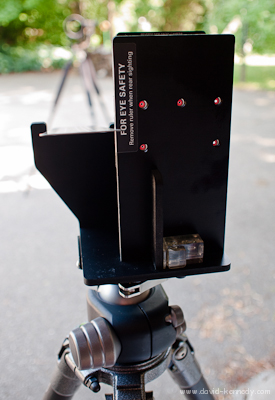
The body of the LensAlign Pro is made of four pieces of extruded sheets of PVC that have been cut with a router.  Two vertical pieces are parallel to one another–the front containing a the focusing target that also holds the “0” mark of the LensAlign ruler.  The rear vertical piece contains the bulls-eyes for making the unit square to the camera position.  A third piece is perpendicular to the other two, and keeps them straight.  All three are screwed into a square of PVC with a 1/4″ tripod thread in the center.  To keep the two focusing pieces parallel to one another, and to prevent them from bending in transit, a length of poster tube is packed between them for shipment.  Keep this piece in the event you ever want to travel with LensAlign Pro!

The ruler is a 9.5″ strip of metal, and it is how one gauges the focus calibration of their camera/lens.  Every other part of LensAlign is designed to work to support this ruler.  So, while in the initial setup the user concentrates on everything except the ruler, during the actual measurement stage, the ruler will be all that matters.

The sight gate is a plastic card that will slide up and down to open and close the bulls-eye’s in the front of the LensAlign.  However, to make it slide, one has to adhere a magnetic strip on the back of it (it’s a little odd that the user has to do this, and I assume it has something to do with labor costs to produce LensAlign, but it is a trivial matter to do it one’s self).

Once set up, the main unit could be used on a tabletop, but a 1/4 inch thread allows it to be mounted onto a tripod.  One could mount the unit onto a light stand, but for reasons explained later, it is better to have the unit on a tripod head that allows movements, such as a ball head.

The enumerator and the ruler

The ruler has various positions that it can be set to (and held in place by magnets). They range from virtually parallel to the imaging plane to almost perpendicular.  However, the LensAlign documentation recommends beginning with the ruler at the third position, and my experience seems to confirm that this is usually a good starting point.

That said, I tend to use the “flatter” ruler positions, 4 and 5, just as frequently as I do position 3.  The greater the distance between the camera and the LensAlign, the flatter the ruler should be, as it makes it easier to distinguish the boundaries of the DOF.

LensAlign Enumerator
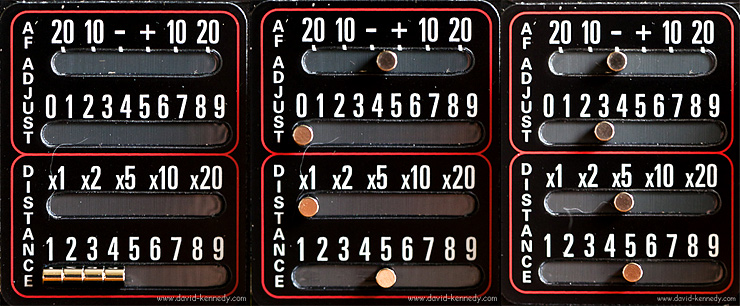
LensAlign Enumerator: Fresh from the factory (left), set up with a neutral AF adjustment at a distance of 5 feet from target (middle), and set with a negative 3 AF adjustment at a distance of 25 feet from target (right)

The enumerator is not essential for the operation of the LensAlign, but it is a handy feature if one makes a series of images at different AFMA’s and reviews them later on a computer screen, as it provides a visual record of the AFMA setting.

Working with Test Photos

That is to say that there are at least three ways to work with the test photos of the LensAlign: review them immediately on the rear LCD screen and tweak the AFMA on the spot, shoot tethered to a computer and review the pictures in the field with the camera, or make the initial (neutral AFMA) test picture and review it in-camera, and then make a series of incremental AFMA changes and download all of the images to a computer for review.

The advantage of the first option is that it might be a little faster, but the latter two choices tend to be more accurate as they involve larger computer monitors for viewing the test pictures.  Hence, if one chooses to review the images on the computer, the enumerator provides an easy reference for the settings used.

Personally, I have tried all three options, and find that they all have their time and place.  I don’t have a setup like Joe McNally, but if I did I would shoot tethered for everything.  (To make his setup, one needs a tripod, a Manfrotto dual-head “bar” to mount on top of it, a laptop table to mount on one side of the bar, and a tripod head of some kind for the other.)  Since I don’t have those parts, I chose to tether only when I was indoors.  Outdoors, I find that I can roughly eyeball whether I’m front or back-focused on the rear LCD of the camera.  Once I believe that I have found the proper AFMA for the lens I’m using, I’ll bring it inside and check it on my computer monitor.

A Word About Placement

Aligning the LensAlign
Orienting the LensAlign towards the camera and lens. Note that I have taken the unnecessary, but helpful step of placing a bubble level on the LensAlign platform.

Before one can make a test image to determine any front or back-focus, one must first place the camera and LensAlign on separate platforms, space them, and make them square to one another.

It really helps to have the LensAlign either indoors with indirect lighting, but I suppose if you’re feeling motivated, you could set up flashes to illuminate it.  When using it outdoors, be sure to place the unit in shade, or use it on an overcast day.  The ruler is extremely reflective, and direct sunlight turns it into a blinding mirror.  You want the light falling on the ruler to be even for easy-reading!

The online distance tool helps to determine how far apart the camera should be from the LensAlign, as well as how “deep” the DOF should be with a given focal length and sensor size.  This distance can also be calculated manually by multiplying the focal length by 25.  So, for a 400mm lens, one would need to be 10,000mm from the target, or 32.8 feet.  TIP: A 50-foot reel measuring tape will be very helpful for this step if you own telephoto lenses!

I have also tried calibrating lenses at their minimum focusing distance (MFD) instead of the recommended distance.  In a way, it’s easier because one just moves back as far as one needs in order to get LensAlign in focus.  Additionally, the target will be larger in the frame the closer one is to it, making the markings on the ruler easier to read.  In fact, in my first draft of this review, I suggested that MFD might be all you need.  But then I was proven wrong!

My advice for telephoto lenses 400mm and longer would be to first make an adjustment for the MFD, and then back up to the suggested distance to confirm the adjustment.  I recently calibrated a 500mm f/4L with my 1D Mark III and discovered that the adjustment made to counteract back-focus at MFD was too extreme, and actually caused front-focus when set at 41 feet from the target.

Aligning LensAlign

Making the lens and target square
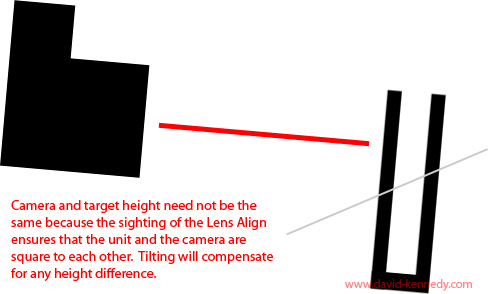
Making the lens and target may involve tilting the camera downwards or upwards at the target, depending on height differences. In any event, it is not necesary to make them level to the world, but to make the two devices square to each other.

The first step you should take is use your tripod head (you have to be tripod-mounted) to position the camera at the LensAlign.  Aim the center focusing point (the most accurate of the focusing points, irrespective of camera brand or model) at the center bulls-eye of LensAlign.  Then, run behind the LensAlign, and looking through the “peep hole” through the center bulls-eye, lock it in position so that you are looking through the center of the lens.  Often, you can see light coming in through the viewfinder of the camera through the middle of the lens, which can help to make it just right.Return to the camera, and switch on Live View (or take a picture and review it on the LCD) and zoom in to see if the center bulls-eye is truly centered in its viewing port.

LensAlign's bulls-eyes
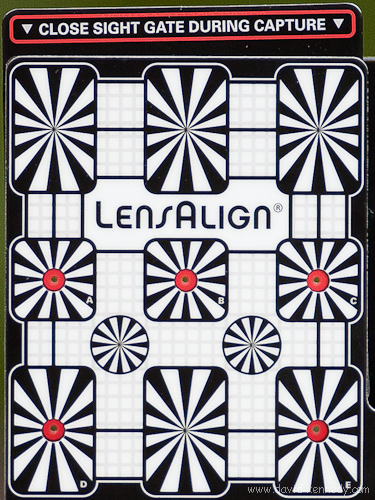
LensAlign’s bulls-eyes – note the (close to) bilateral symmetry. At shorter focal lengths, not every bulls-eye will be centered, and the target of greatest importance is always the bulls-eye in the center

An aside:To my knowledge, every camera that has the ability to make AFMA changes also has live view.  However, the LensAlign is helpful even with cameras that do not have this feature, as it can confirm whether or not there is a focus problem with a given lens.  If there is a problem, the user can take the data and decide whether the front or back-focus exhibited warrants sending the camera and lens to the manufacturer to be professionally calibrated.

While the LensAlign manual does explain how to make the unit square to a camera, I have found that it helps to pay attention to more than the center bulls-eye, but to consider all of them.  Especially at shorter distances and wider focal lengths, the other four bulls-eyes will not be centered in their viewing ports, but making sure that they are symmetrical on opposite sides of the center bulls-eye ensures that the plane of the LensAlign is parallel to the camera’s sensor plane.

Corrections and A note about Keeping Things Level

In the original version of this review, incorrectly stated that the body of the LensAlign is made from black masonite.  While it has that apperance, it is actually made from PVC.

Additionally, in the original posting I emphasized that keeping both the camera and LensAlign level, by means of a hot shoe bubble level or otherwise, would be a good idea.

After speaking to Michael Tapes directly, I stand by thinking that it’s helpful to keep things level, but agree that it is not essential for the operation of LensAlign. Hence, I have removed it from the section about aligning the focus target to the camera lens.  In fact, he told me that the absence of a level “wasn’t a casual omission.”  He believes that adding a level the product would make it appear to the user that being level was part of making the camera and focus target square, when it is not, in fact, a necessary step.

A level camera and a level focusing target will not change the DOF–it’s a constant.  Camera lenses do not draw rectangular images, but circular ones, so how the camera is rotated on the lens doesn’t change the DOF.  However, I find that leveling both helps in reviewing the images from LensAlign, because my beleaguered brain doesn’t like to look at picture of a ruler that is skewed at a 5° angle.

Tilted LensAlign
The LensAlign functions the same whether level or not, but you may find you prefer to read a straightened ruler as opposed to a tilting one!

For me, I find the lack of a level to be my lone frustration with the product.  I say this because it is downright annoying to constantly walk back and forth between the camera and the LensAlign while trying to remember to take the level with me each time.  When I walked 41 feet out to the 500mm lens that I was trying to make square to the focus target, and realized that the level was still sitting on the back of the LensAlign, I really started grousing!

But to reiterate: it is not necessary to do this extra step of leveling the two devices, I just prefer to work this way, and I think many photographers who will take the time to change the AFMA in their cameras will feel the same as I do that looking at a level measurement tool is easier than looking at one that is tilted, even if the data is the same.

Read part two of the review now!