Part Two:

This is a continuation of my two-part review of the LensAlign Pro. You may wish to refer to part one before continuing!
Final Preparation for Testing
So you’re set: you’ve calculated the distance you need, set up your camera on a tripod (and possibly placed LensAlign on another tripod or a sturdy table), and you’ve confirmed LensAlign is square to the camera/lens in Live View or by zooming into a review image. What now? Close the Sight Gate so that your camera cannot focus on the rear standard of the LensAlign. Set the ruler to the third position (20 degrees) for initial testing. Ensure that you are set to you lens’ largest aperture; if you’re calibrating a 50mm f/1.4 lens, you need to be shooting at f/1.4. Expose properly for your lighting situation–you do not want overexpose the ruler!
A Brief Note on Technique
Even though you’ll be working on a tripod at reasonably fast shutter speeds, I find it can help to set the camera in mirror lock-up with a two-second countdown timer when working with 70-200mm lenses and smaller. For larger lenses with tripod collars I switch out the ball head for a gimbal-style head and employ the long-lens techniques I’ve learned from Arthur Morris: I lock down the lens with my arm hooked around the head and down onto the lens while applying pressure to the top of the camera with my forehead as I look through the viewfinder.
To make the test image you will manually rack the focus so it’s blurred, and then have the camera autofocus on the center of the target: you want the camera to have to “work” to get the image in focus. Make an image and review it.
For now, I’m going to assume you are using a prime lens. Check the LensAlign Distance Tool for a calculation of how much DOF should extend in front and back of the focus target (0 mark on the ruler). For this example I will assume the calculation is close to 50-50. The first thing you need to determine when looking at the review image is where the DOF begins and ends, bearing in mind that you want the DOF to split evenly on the top and bottom halves of the ruler.
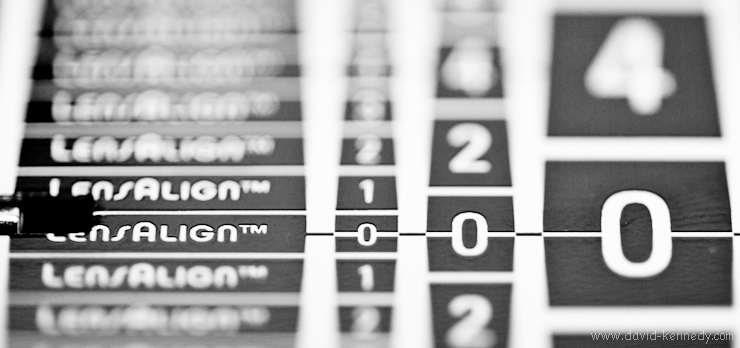
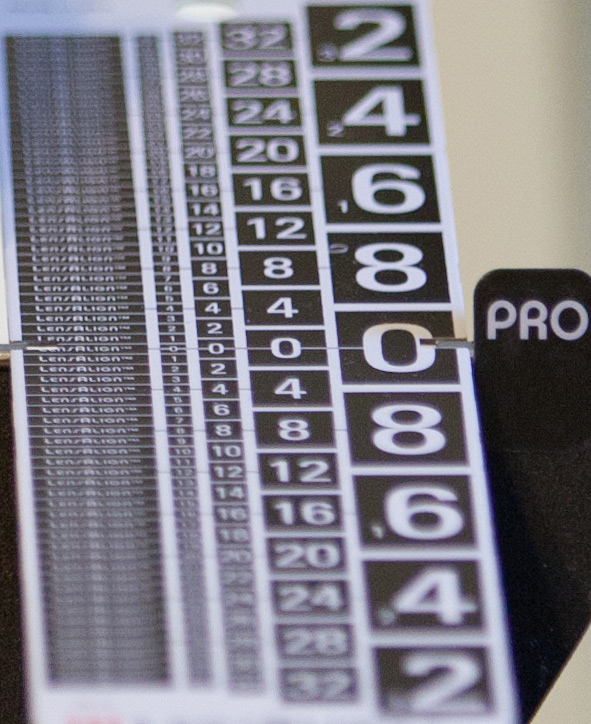
When you’re reading the ruler, look for noticeable crispness in the numbers, starting with the large ones. Is the “8” sharp on both the top and bottom? How about the “6” or the “4?” Sometimes, the larger numbers are a bit confusing, but as your eye scans the ruler, look at the columns of smaller numbers and ask yourself what is the last number you can read clearly on the top of the ruler, and then look and compare that to the corresponding number on the bottom of the ruler.
If you think the numbers on the ruler are hard to read, or that it is difficult to tell where the boundaries of the DOF lie, try adjusting the ruler angle. Rarely do I use the first (45 degrees) or second (30 degrees) position, but I frequently will make the angle harsher and go to the fourth position (12.5 degrees) to camera. Especially for longer lenses, a shallower angle really helps to clearly spot the boundaries of the DOF. Note that for those who want a longer ruler to judge autofocus on long lenses from greater distances than the proscribed eight feet per 100mm of focal length, the LensAlign Long Ruler Kit gives the Pro a larger focus target and a four-foot long ruler.
If the DOF is pushed to the top half of the ruler, your camera is back-focusing, and you will need to use a negative AFMA correction to “pull” the DOF back down the ruler. If the DOF has mostly sunk to the bottom half of the ruler, your camera is front-focusing, and you will need to use a positive AFMA correction to “push” the DOF up the ruler. If the DOF falls perfectly on both sides of the “0” mark of the ruler, then congratulations, you’re done with this lens, and can move on to the next!
Correcting Front or Back-Focus
Begin with a simple adjustment: one increment in the direction needed to correct the focus. After setting the AFMA in the camera menu, turn the focus ring by hand so that the camera will have to re-acquire focus, and make a new test frame. (If you wish, you may alter the enumerator so that the AFMA is recorded in the frame.) In my experience every lens/camera is different, and responds differently to AFMA corrections. Sometimes, a +1 adjustment appears to have no effect in pushing the DOF up the ruler to correct front-focus, and it may take more drastic increments (+5, +10) to get into the ballpark. Other times, the change is dramatic and +1 or +2 moves the DOF significantly. Start small, and work your way up (or down) the AFMA scale until you find the right setting for your lens.
The following video is an example of one lens/camera combination where changes in AFMA were very, very slight, and it wasn’t until -18 that I found a good balance of the DOF on both sides of the ruler. Here you will see it step-by-step, but in practice, I first attempted -1, then -2, and -5. When no change was apparent, I jumped to -10, and then to -15. From there I went step-by-step until hitting -18, the “sweet spot.”
LensAlign Pro Demonstration from David Kennedy on Vimeo.
At 0 AFMA, the back-focus is quite significant, so you will only gradually see the numbers on the bottom half of the ruler come into focus in balance with the focus on the top half of the ruler (achieved at -18 AFMA).
What about zoom lenses?
Put simply, calibrating zoom lenses is a balancing act. Most cameras provide only one AFMA per lens (Olympus seems to be the exception to the rule), but zoom lenses comprise a great number of focal lengths! Test the focus performance of the lens at some of its designated focal lengths marked on the barrel; on a 16-35mm lens, you might test at 16mm, 24mm, and 35mm. Unfortunately, the AFMA that is ideal for one “end” of the zoom range might not be as good for the other. In such circumstances, you will have to make a choice of which one is more important to you for that lens.
For instance, I have both a 16-35mm lens and a 24-70mm lens, and there is obvious overlap between the two. When calibrating my 16-35mm, I found that the ideal AFMA for the 16mm setting resulted in severe front-focusing at 35mm. However, my 24-70mm lens works quite well throughout its zoom range, so I decided to keep the setting on my 16-35mm to make the widest end perform the best, knowing that if I want to zoom in longer than 24mm I will change lenses.
Using the Emboss Filter

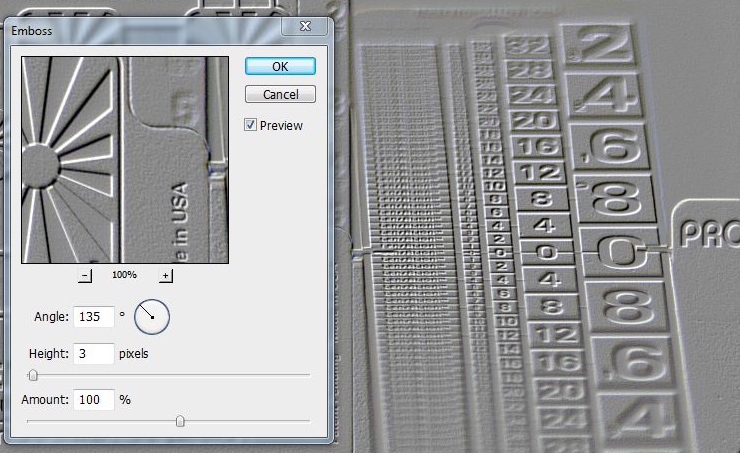
Whether reviewing the images on the back of the camera or on a computer, there are times when it is less obvious which AFMA correction offers the very best balance of DOF on both sides of the ruler. When trying to choose between two or three AFMA settings, try loading the photos into Adobe Photoshop and applying the emboss filter with an angle of 135 degrees, a height of 3, at an amount of 100%. The “relief” image you will create can help identify the exact edges of the DOF.

How long does calibration last?
For a while I believed that AFMA is something you could “set and forget.” There are exceptions to this, of course: every time you send in a camera or lens to the manufacturer for service you should put it back on the test bench with the LensAlign. Do not be fooled if the AFMA changes are still in the camera you just had returned from the factory: test and verify for yourself that they still work well. This happened to me in the fall of 2010 when I sent in my Canon 5D Mk. II for a “clean and check” and it was noted that autofocus had been re-calibrated at the factory. The body came back wiped but with AFMA changes still registered, but they were no longer ideal adjustments: I had to calibrate my lenses all over again.
There are times when the ideal AFMA setting may shift for a host of reasons that are beyond a user’s control. It would seem to me that testing AF performance on a quarterly basis is an easy rule of thumb that most users can follow, but for professionals a more proactive approach might be needed.
In talking to Michael Tapes, he offered the following advice: calibrate using LensAlign before any big shoot (travel, a high-paying portrait shoot, etc.) and then again a month later. Wait two months from that day and confirm if the AFMA is still working for your camera/lens combination.
Conclusion
The LensAlign family is products is, for the moment, the only game in town for accurate autofocus micro-adjustment calibration. None of the major camera manufacturers have a consumer product to use with their micro-adjustment-capable cameras, and it wouldn’t appear that any of them intend to fill the void that they created when they released a feature with no corresponding tool. Yes, Datacolor is attempting to compete with the Spyder Lens Cal, but their product has no means of squaring the target to the camera, making it pretty much useless. It simply doesn’t provide the accuracy or repeatability that you find in Michael Tapes’ LensAlign.
The good news is that even if LensAlign is the only practical tool available, it’s a good one. The LensAlign Pro is a very sturdy and capable product: squaring it to the camera is fast, the ruler can be locked into several different angles so you can adjust the experience to your preference, and the handy enumerator makes visual “note taking” of distances and AFMA settings a snap. At $180 the LensAlign Pro is not an inexpensive product, but this is not another injection-molded plastic wonder: each one is assembled by hand individually in the United States and then laser-tested for accuracy.
The disadvantage of the LensAlign Pro is that its sturdiness and size means that it doesn’t travel well: it’s a unit that stays home or can be packed in a car, but air travel is almost entirely out of the question.
Michael Tapes clearly recognized that retail price was an issue for some people, and the size of the LensAlign Pro meant that shipping internationally was a problem for the company, so he created a new stablemate, the LensAlign MKII. The new product sells for $80 and offers much of the same functionality as the LensAlign Pro in addition to packing flat both for shipping and travel. A review of the MKII will be posted here before the end of the month, but in short new product is essentially a scaled-down, less expensive LensAlign Pro. There are some advantages to the bigger brother, however, and as Michael Tapes explained over the phone people will buy the LensAlign Pro if: “They want the enumerator, they want the ruler angles, or they want the 4-foot ruler.”
The bottom line is that if you are serious about getting the sharpest images from your micro-adjustment capable camera, you cannot go wrong with the LensAlign Pro. Highly recommended!

[…] the LensAlign Pro, so you may wish to refer to my review of the LensAlign Pro (Part One and Part Two) before continuing. Also, if you own a LensAlign MkII, you should consult the LensAlign resources […]
[…] part two of the review […]